Want to learn how to use a spotting scope for birding? Wondering if a spotting scope is right for you? You’ve come to the right place.
In this article, you’ll discover how to use a spotting scope for birding. We’ll also cover whether a spotting scope is right for you, the essential equipment you’ll need, common mistakes to avoid, and how to care for your gear.
If you’re planning to buy your first spotting scope or want to sharpen your skills, this article will help you. Let’s explore how to use a spotting scope for birding!
Table of Contents
- Is a spotting scope right for your birding?
- Understanding your spotting scope
- Essential equipment for using a spotting scope
- How to use a spotting scope for birding
- Common mistakes to avoid
- Maintenance and care
- Final thoughts on how to use a spotting scope for birding
Is a spotting scope right for your birding?
According to the Merriam-Webster dictionary, a spotting scope is “a lightweight portable telescope that is usually mounted on a tripod and used for viewing wildlife and terrestrial objects and features.” It lets you see birds that are too far away for regular binoculars to show clearly.
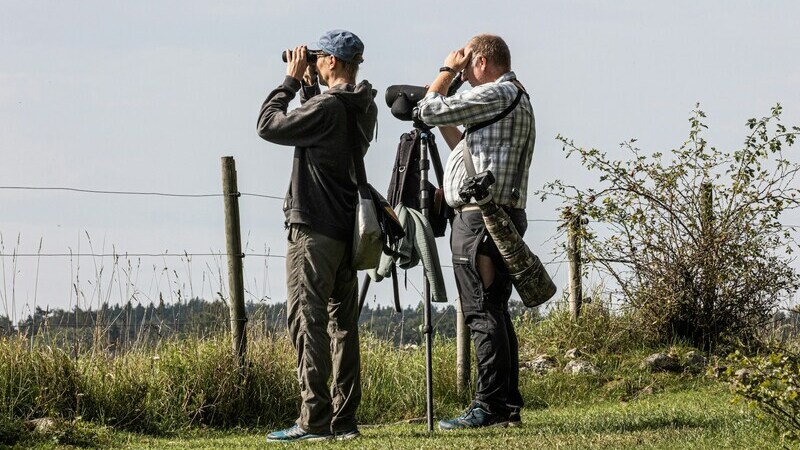
Spotting scopes work best in open areas where birds are far away but not moving too much. They’re perfect for watching waterfowl on lakes or shorebirds on beaches. They’re also great for seeing hawks on distant perches or birds spread out across mudflats.
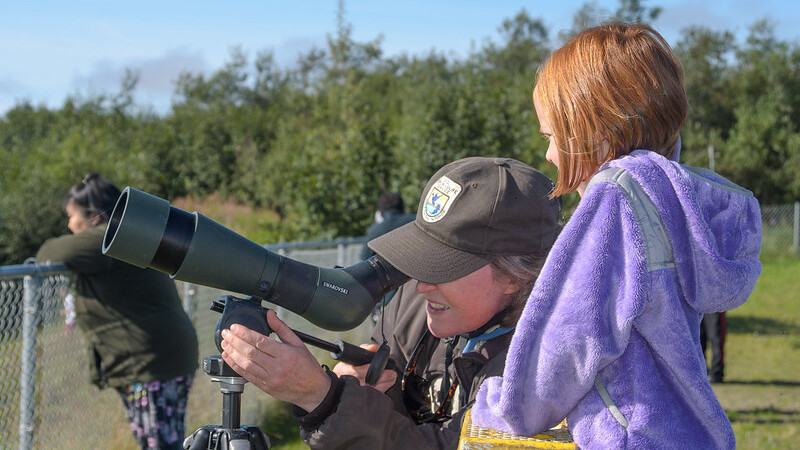
If you often visit lakes, beaches, or other open areas, a spotting scope could be very useful. It helps you see tiny details on birds that are far away. It’s also great if you lead bird walks and want to help others see distant birds. Some birders even take photos through their scopes, a practice known as digiscoping.
But spotting scopes aren’t ideal when you’re heading into the woods. The dense trees make it hard to use a scope effectively. It’s also not the tool for following quick, active birds jumping from branch to branch. And if you need to identify birds quickly, a spotting scope’s setup time and narrow view can slow you down.
So, a spotting scope might not be right for you if you mostly watch birds in forests or your backyard. New birders should also focus on learning to use binoculars first. A scope can be tricky to handle if you’re still getting comfortable with binoculars.
Remember, spotting scopes are a big investment. They’re more expensive than most binoculars and need a good tripod too. They’re also heavier to carry and take time to set up. So, take some time to consider whether you truly need one before making a purchase.
Understanding your spotting scope
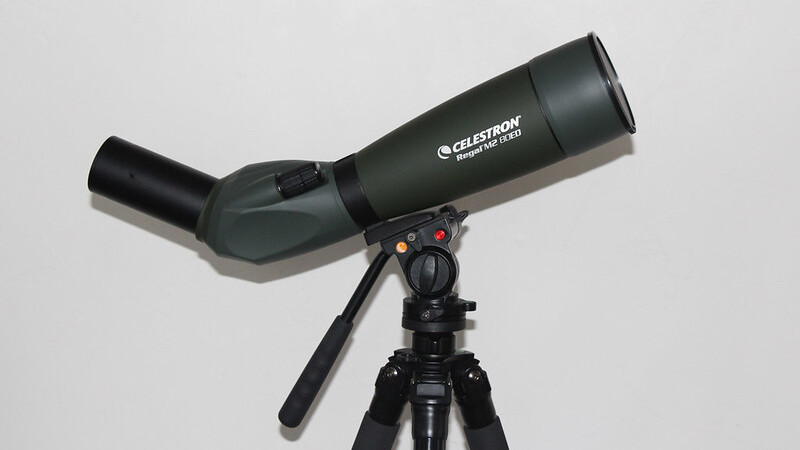
Let’s start with the basic parts. A spotting scope has an eyepiece where you look through, an objective lens at the front, and focus wheels to make the image sharp. The main tube that connects these parts is called the body or barrel. There’s also a mount to attach your scope to a tripod.
Spotting scopes come with important numbers you should know. The first is magnification power, usually shown as “20-60x.” This means you can zoom from 20 times to 60 times closer than your naked eye. The second number, like “80mm,” tells you how wide the front lens is. A bigger front lens lets in more light, giving you a brighter image.
There are several types of spotting scopes. Some are compact and lightweight, perfect for hiking. Others are larger and more powerful, better for serious bird watching. You can choose between fixed magnification (one zoom level) or zoom eyepieces (adjustable zoom levels).
When choosing between angled vs. straight spotting scopes for birding, consider how you’ll use it. An angled scope usually has the eyepiece at 45 degrees. This helps you look up at birds comfortably. It also makes sharing views easier for people of different heights.
A straight scope is better for watching birds from a car window or looking down from a hill. Most birders prefer angled scopes because they’re more versatile. They’re also easier on your neck during long viewing sessions.
Essential equipment for using a spotting scope

Using a spotting scope for birdwatching can be rewarding, but having the right gear is key. To get the most out of your scope, you’ll need at least three essential pieces of equipment.
1. A sturdy tripod
The first piece of equipment you’ll need is a reliable tripod. Unlike binoculars, you can’t hold a spotting scope in your hands. The high magnification makes the image sensitive to movement.
A good tripod keeps your scope steady so you can see birds clearly. When choosing a tripod, make sure it’s sturdy enough to support your scope’s weight. A wobbly tripod will only lead to frustration in the field.
2. A carrying case
Next, you’ll need a good carrying case to protect your scope. Spotting scopes are expensive and delicate instruments. A proper case shields your scope from dust, moisture, and accidental bumps during transport.
Look for a case with enough padding and weather resistance. Some cases come with space for accessories, which is very handy in the field.
3. Lens cleaning supplies
Finally, keeping your scope’s lenses clean is crucial for the best views. When dust collects on your scope, always use a lens brush or blower first. This helps remove loose particles before you do any wiping.
For stubborn spots like fingerprints or water marks, use a soft microfiber cloth and a lens cleaning solution. Never use regular tissues and glass cleaners because they can damage your expensive scope.
How to use a spotting scope for birding
We’re now at the main part of this article, which will explain how to use a spotting scope for birding. Using a spotting scope might seem tricky at first. But it becomes much easier when you follow the right steps. Let’s go through the process step by step.
1. Setting up your scope
The first thing you need to do is set up your scope correctly on your tripod. Make sure the mounting foot of your scope is securely attached to the tripod head. Don’t forget to remove all the protective covers from both the front lens and the eyepiece.
If you don’t wear glasses, pull out the eyecup to help position your eye at the right distance from the eyepiece. Before you start viewing, check that your tripod is standing firmly on stable ground. Adjust the legs if needed to make sure everything is level and steady.
2. Getting ready to view
Always start with your scope at its lowest magnification setting. This gives you the widest view and makes it easier to find what you’re looking for. Before moving your scope, look at where your target bird is and notice what’s around it.
Look for things that don’t move, like a distinctive tree, a large rock, or a post. These landmarks will help you point your scope in the right direction. Use these landmarks to guide your scope into position. Move smoothly until you’re pointing at the right spot.
3. Fine-tuning your view
Once you’ve found your bird in the scope, you can start making adjustments for a better view. Slowly increase the magnification if you want to see more detail. Take your time adjusting the focus wheels until the bird appears sharp and clear.
When you’re happy with your view, tighten the tripod head to keep the scope from moving. Now you can enjoy watching your bird without having to make more adjustments.
4. Taking photos through your scope (optional)
If you want to take photos through your scope, you’ll need a camera or smartphone adapter. Attach your adapter securely to the scope’s eyepiece. Make sure your phone or camera is firmly connected to the adapter. Get your bird in focus first using the scope, then take your photos.
Remember that digiscoping requires extra patience. Any small movement can affect your image quality. Actually, all of these steps might feel awkward at first. But they’ll become natural with practice.
Common mistakes to avoid

Even experienced birders make mistakes with their spotting scopes. But knowing what these common mistakes are can help you avoid them. Here are the main errors to watch out for when using your scope:
1. Setup errors
Setting up your scope correctly is crucial. The most dangerous mistake is not locking your tripod legs properly. When you extend the legs, always double-check that each section is firmly locked. If not, a leg might collapse suddenly, and your expensive scope could crash onto rocks or hard ground.
Other setup errors include using an unstable surface or not attaching the scope securely to the tripod. Always make sure your tripod stands on firm, level ground. Check that your scope is properly attached into the tripod head before you let go.
2. Focusing issues
Focusing issues often happen when people start with too high magnification. While you can decrease the power, it’s much harder to find your bird at high magnification because your field of view is so narrow.
Always start at the lowest power to find your bird. Once you’ve found it, slowly increase magnification while adjusting the focus. Remember that higher magnification makes the image less stable and harder to focus.
3. Storage mistakes
Taking care of your scope between uses is also important. Many people forget to put the lens caps back on after birding. This leaves the lenses exposed to dust and possible damage. Always store your scope in its protective case when you’re not using it.
These mistakes are common, but they’re easy to avoid once you know about them. Take your time setting up, be patient when focusing, and protect your scope when you’re done.
Maintenance and care
Your spotting scope is a valuable tool that needs proper care to stay in good condition. Here’s how to maintain it properly:
Cleaning the lenses
Only clean your lenses when they’re visibly dirty or when the view quality is affected. Too much cleaning can wear down the special coating on your lenses.
When cleaning is needed, start by removing loose dust and dirt with a lens brush or blower. Never wipe dusty lenses directly because the dust particles might scratch the glass.
If you find fingerprints or water spots, use a special lens cleaning solution with a soft microfiber cloth. Always be gentle when cleaning. Never use regular household cleaners or paper tissues as these can damage your scope’s lenses.
Storage recommendations
Proper storage helps protect your scope and keeps it ready for your next birding trip. Always put the lens caps back on when you’re done using your scope. Store your scope in its protective carrying case. Don’t leave it exposed to dust or possible damage.
Remember, a well-maintained spotting scope can last for many years. Taking a few minutes to clean and store it properly after each use will help protect your investment.
Final thoughts on how to use a spotting scope for birding
Learning how to use a spotting scope for birding takes time and patience. But the rewards are worth it. With a spotting scope, you’ll see amazing details on distant birds that you’d miss with binoculars alone.
Remember the key points we’ve covered. Get essential equipment like a sturdy tripod, and follow proper setup steps. Start with low magnification, use landmarks to find your target, and take time to focus carefully.
Don’t get discouraged if your first attempts aren’t perfect. Like any skill, learning how to use a spotting scope for birding gets easier with practice. Soon, you’ll be spotting and identifying distant birds with confidence.
